Showing posts with label ANDROID TRICKS. Show all posts

How to Find / Trace My Switch off Android Phone

How to Find / Trace My Switch off Android Phone

Smart Phones have become integrated part of the lives of people as they not only help to make calls but also allow them to browse internet and make payments. It stores confidential information; therefore security of the phone is of paramount importance to the users. In case, the mobile gadget is stolen, the loss can be bigger than the loss of money wallet. In order to track the cell phone, use its inbuilt attributes and access the data for advanced management.

How to track a lost phone that is switched off

How to track a lost phone that is switched off

Ring the phone:

If you have accidently misplaced the phone in the house and want to get it quickly without the loss of data, use its device management tools from the web browser on the computer and tablet. They can find the exact location of the phone within 25 min radius and can ring the phone even if it is on silent mode. It is one of the fastest ways to find the device however would not work with phone which is turned off.

Lock down:

Device manager is an important application that would not only able to track the phone kept in the house or in close vicinity. If the remote device management is switched on, you can lock the phone and change the password from your laptop. With the help of the application, you can easily restrict the data access to thief. In order to use the remote management feature, the phone should be switched on. Even if it is off, the remote commands kicks in once it is turned on by the miscreants.

Delete the information:

Once the remote device management kicks in, you can take precautionary steps to secure information from the thief or hackers. Device manager can be configured to delete the data remotely, as soon as the phone is switched on. Even after tracking, the phone is not found; it is probably the safest step to make sure that your personal data is not compromised.

Tracking by the IMEI number:

Although users do not have the right to undertake IMEI tracking, they can contact the mobile network operator who would help to monitor the location of the phone even if it is switched off. The
If you are an apple phone user log in to the icloud account with the help if the Apple ID. Once on the login page, click on the Find my phone button. It will provide list of options if you have more than one device configured to the virtual manager. Mobile can be easily tracked down if it is switched on.
If you are a window phone user, visit the window website and click on find my phone option in the browser. Once invoked, it can provide detailed map of the lots mobile gadget.

Usage of the Drop box camera:

Drop box can play a very important role in tracking the phone, if the application is installed. The phone should be online and camera upload setting in the application needs to be switched on. If the thief is using camera on the stolen phone, the drop box can instantly send the images remotely to the laptop of the owner.

Anrdoid Tricks - Insufficient Space On Device while Downloading

How To Fix “Error Downloading There Is Insufficient Space On Device” On Android ?

Anrdoid Tricks - Insufficient Space On Device while Downloading

Method 1:-

When you don’t have enough storage space available in your device.

If you are running low on storage on your android smartphone, here are a few tips for you that can help you get rid of “Error Downloading- insufficient space on device”. Then, you can resume installing apps on your Android device from the Google Play store.

  • Uninstall unnecessary apps.
  • Clear Cache.
  • Delete Junk files.
  • Move media to SD card.
  • Transfer photos to cloud storage.
  • Clear Content of less used apps.


Method 2:-

Even if you have sufficient storage available on your Android device, Google play store might show “Error Downloading there is insufficient space on device”, and here is a method to fix it.

Step 1. Go to Settings > Applications.

Step 2. Swipe to “All applications“.

Step 3. Scroll to the Google play store app and open it.

Step 4. Click on “Clear Cache” & “Clear Data

Step 5. Reboot your phone.
play store app info android


Method 3:-

If Method 1. Doesn’t work for you, then you need to reinstall your Google Play store app.

Steps To Reinstall Play Store To Fix Error Downloading There Is Insufficient Space On Device” are:

Step 1. Go to Settings > Applications.

Step 2. Swipe to “All applications“.

Step 3. Scroll to the Google play store app and open it.

Step 4. Click on Uninstall updates.

uninstall updates google play store

Step 5. Reboot your device.

Step 6. Open the play store once, and keep the device connected to the Internet while your phone updates Google Play tore in the background.

Once the update is complete, you can resume installing apps on your phone from the Google play store.

In conclusion, We strongly hope the above guide helps you remove “Error Downloading there is insufficient space on device” for your Google Play Store. For any queries, write to us in comments below.

How to Replace Kingroot with SuperSU in Any Android

How to Replace Kingroot with SuperSU in Any Android

hello friends today's post i am going to tell you the easiest way to replace your kingroot to super su. super su is very successful way to run rooted apps in android phone. In this guide you will learn all about how to remove/replace Kingroot/Kinguser with SuperSU/Superuser app in any Android phone. Rooting Android device is normal nowadays. It’s the process which unlocks your Android phone fully. You can access all internal features of your device by it. After rooting user gets access to the Superuser. It’s something whose permissions are required whenever you tries to make changes in Root of your Android.
How to Replace Kingroot with SuperSU in Any Android


Requirements To Replace KingRoot With SuperSU

For removing or replacing Kingroot with Superuser on your device, you must need some basic requirements as followed below. Check them out and remove Kinguser with Superuser easily on any Android phone.

  •     Rooted Android Device – Read: How To Root Android Without PC
  •     Download & Install Terminal Emulator app.
  •     Download Replace_Kinguser_with_SuperSU Zip File.
  •     Zip File Extractor App (Like: Es-File Explorer)

Replace Kingroot with SuperSu (Simplest Way)

It’s the easiest and simplest way to replace Kingroot with SuperSU on any rooted Android device. You just have to install SuperSU app from Play store and uninstall Kingroot from your device. That’s it. Let me explain step by step:

  •     Open Play store.
  •     Search for SuperSU & Install it.
  •     Open it and give permission as a Superuser.
  •     Now, uninstall Kingroot app.
  •     Update SuperUser Binary and Reboot your phone.
  •     Voila!! That’s it.
So guys, it’s the first and easiest trick to replace Kingroot with SuperSU. But if this one doesn’t works for you, you can try out second method followed below.

Read More:-How to Permanently Block ADS from Android without Root


Read More:-HIDE ROOT TRICKS - Hide root in Android phone easily from Apps

Read More:-Root Any Android phone without pc - Latest Android Trick


Steps To Change WiFi MAC Address in a Minute

Steps To Change WiFi MAC Address in a Minute
hello Guys if You Want to change Your Wifi mac Address of Your Android Phone Then You Can Change Wifi Mac Address in Couple of Steps. this is the Best Easy Way to Change Your Wifi Mac Address.
Steps To Change WiFi MAC Address in a Minute
First of all, WiFi is a great technology for modern gadgets. Since most of our phones, laptops and appliances use WiFi to connect to each other and the Internet. Because WiFi offers a very fast and reliable wireless connection, it is widely accepted all around the world. As the connection is wireless, security maybe a major concern for users. Even though WiFi has secure passwords while connecting, there are furthermore security measures. Each device has a MAC address (Media Access Control). This address is the identity of a device on a WiFi network. It unique for each device and is saved in the device by the manufacturer. To change the identity of your device on a WiFi network, you need to change your WiFi MAC address. This cannot be done easy, therefore we have a guide for you on How to change WiFi MAC address on Android. You can follow the given trick to easily change the MAC address of your Android smartphone.

How To Find WiFi MAC Address On Android.

To check the current MAC address of your Android phone, follow the given steps.
Step 1. Go to Settings. Then tap on WiFi.
Step 2. Now, in option, go to Advance.
Step 3. Scroll to the bottom. Here you will see your IP as well as WiFi MAC address.

How To Change WiFi MAC Address On Android.

If you want to change the MAC address of your Android smartphone, follow the steps given below. They probably will seem a little complicated, but follow them one at a time and you can easily change WiFi MAC address on Android.

Note:-  You need a Rooted Android smartphone for this tutorial to work. To know more about rooting, click How To Root Android

Step 1. Make sure you have BUSYBOX installed on your phone. It is very essential for this guide to work. If not, then download it from the link below.

Download From Playstore 

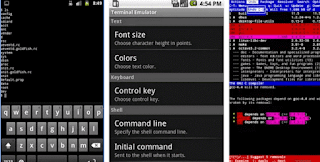
Step 2. Install a Terminal Emulator. You can install one from the Google Play store link given below. A terminal app lets you run Linux based commands on your Android smartphone. Download From Playstore

terminal emulator

Step 3. Open the Terminal app and type the commands given.

$ su [HIT ENTER]
$ busybox iplink show eth0 [HIT ENTER]
You will now see your MAC Address.

Step 4. Then enter the following command.

$ busybox ifconfig eth0 hw ether XX:XX:XX:XX:XX:XX [HIT ENTER]. (In the above command, replace XX:XX:XX:XX:XX:XX with your new MAC address)
You have now spoofed MAC address on android successfully.

Read More:-How To Recover Deleted Files From Android Internal Memory (3 Method)
 How To Recover Deleted Files From Android Internal Memory (3 Method)
Read More:-Steps To Control Any Android Phone From Computer / Pc
 Steps To Control Any Android Phone From Computer / Pc

How To Install One App Two Times On Android

How To Install One App Two Times On Android

Are you looking for What I typed in above heading? Yeah that’s why you are here. Have you ever tried to install one app two times on Android ? Off course you are tried guaranteed. Well, I don’t know you are succeed or failed in installing same app twice on your Android device. Don’t worry if you aren’t able to install any app twice on your Android phone, because in this article I am going to sharing best method to install one app 2 times on Android without root. You don’t need to root your Android phone for using this guide. So don’t worry about breaking up your phone by rooting.


How To Install One App Two Times On Android

Installing same app many times!! It isn’t interesting in hearing? Yeah!! Now you can install any app many times on one Android phone. For it you just need to follow my guide which is described below. Many Android users wants to run one app two times on their Android phone like Run two Whatsapp, Facebook, Instagram accounts on same Android device. They starts searching on Google about how to install same app twice on Android phone?. By this, some people can easily found easy guides but some aren’t and they still looking for easiest trick to install one app 2 times on Android.

Are you also looking for tutorial to run multiple instances of same app on Android? If Yes then this post is specially written for you. In this article, I am sharing full step by step guide by which you can install any app many times on your mobile without rooting. Many tutorials are posted on Google but most of them needs rooted device which is too bad requirement for Android users. No one wants to root their device for this purpose, because there are so many disadvantages of rooting.

How To Install One App Two Times On Android

If you already tried to run same app multiple times on your Android, then you are experienced that it’s not an easy task. If you just wants to run two Whatsapp accounts on your phone, then I recommend GBWhatsapp app which works fine without root also in any Android. But if you wants to run different apps multiple times, then follow this guide. It is the simplest way to install any app two times on any Android device without root.

If you really wants to run same app twice on your Android phone and still facing problems in finding best way for it. Then don’t worry, I will describe full steps with screenshots in below section. It is the easiest and simplest trick ever for this. And one of the best factor of this method is that you don’t need to break up your device by rooting. I also shared some cool Android tutorials like how to download paid apps for free on Android and how to remove defaults apps from Android, must have a look a them. And once again I am going to sharing another best cool trick for all Android users.

Requirements To Install Same App Twice On Android Without Root

First your have to look at some basic requirements to install any app twice on Android. Don’t worry there is no special requirements. Only some conditions are necessary to install any app two times on same phone. So check these some necessary requirements to install one app 2 times on your device.


  •     Parallel Space App (Download Link In Steps Below)
  •     Non Rooted Android (Also Works In Rooted)
  •     Some Free Space On Your Android
  •     Android 4.0 Or Higher Version (App Will Not Work In Devices Having Lower Than Android 4.0 Versions)

So guys, these were some basic and necessary requirements to install one app two times on Android. Well, these are not difficult things. You can easily manage all of the above described steps. Also I provided download link for you in the guide given below, so you don’t need to visit any other site for it.

Must Read:- HIDE ROOT TRICKS - Hide root in Android phone easily from Apps
 HIDE ROOT TRICKS - Hide root in Android phone easily from Apps
How To Run Multiple Instances Of Same App On Android

So let’s proceed to the steps for install one app two times on Android. Here is the full step by step guide to install and use same app twice on your Android device. First you have to look at requirements for this method which are given above. In this guide I am using Parallel space app so if you ever tried it and failed. Then feel free now you don’t need to search on Google again about how to use Parallel space app for installing one app twice. Let’s follow the guide.

1) First of all you have to download a simple app called Parallel Space on your Android phone. Here is the download link for this app:

Download Parallel Space

2) Your will be redirected to Play store from above given link, so click on Install button and download it on your device.
Parallel space app play store

3) Open the app after installation on your device.

4) After opening, it will show you some apps which are already installed on your phone. (Screenshot given below)
install one app two times on android

5) Now, you have to Add the app which you want to install two times on your mobile. So click on app, it will start creating Clone of that app.
install one app two times on android

Read More:-Easy guide to share any large file on WhatsApp
 Easy guide to share any large file on WhatsApp
6) Within few seconds it will complete adding and clone of that app will successfully created in Parallel space with new data.
install one app two times on android

7) It will launch same app with new data on your screen and it will run like it’s a new app which was not installed ever before on your phone. (I added Whatsapp in Parallel Space as screenshot given below)
install one app two times on android

Make new account in this app and access one app twice on your device. It means your original app is still running with old account and second app will run in Parallel space app with another account.

That’s it. This is How you can run multiple accounts of same app using Parallel space app. You can use Dual Whatsapp, Dual Facebook, Dual Instagram on same Android phone by following this trick. Now, you same use same version of app twice on Android without rooting. Use non rooted device without any error. There is no need to root your phone for this trick and that’s why It is the best method ever to run same app two times on Android mobile.

Read More:-Force stop apps which Automatically Opening After Install or Update
 PayZapp App trick offers for feb 2016

Way to Set low battery notification ringtone in Android

How to set low battery notification ringtone in Android

How to get notified when our Android battery is low? I know this question is appeared in your mind. So let me answer. What if you install any app which will ring your device whenever your battery is low? Yes, there are so many apps available for Android devices which allows you to get notified with tone when your system’s battery is low. Now, another question appearing in your brain is that which are best apps to set low battery ringtone in android? It isn’t appeared in your mind? Off course Yes, it is. So let, me tell you best app to get alert on low battery in android devices. In this tutorial, I will explain full step by step guide to install and set an app by which your Android mobile starts ringing on low battery.
Way to Set low battery notification ringtone in Android

Let’s come on the steps to set low battery ringtone in Android phone. There is no special requirement to following this guide. All you need is to just download a single app and have to apply some settings in it to notify you when your Android battery going to drained out. You will surely protect your phone from getting stitched off due to low battery reason after installing this app. Because this due to this app, you Android will start ringing automatically on low battery. So, you can charge your Android phone before it get turn off by drained battery. Here is the method to set android low battery ringtone.

Read More :- Youtube Tricks ( Trick to Watch Youtube videos in Mx player )
 
1) First step, you have to do is download Battery Notifier BT Free app on your Android phone.
set low battery notification ringtone in android

2) After downloading the app, open it and then click on Settings option.
set low battery notification ringtone in android

Set low battery notification ringtone in android

3) It will show you list of settings, click on Low battery charge options option from that list.
set low battery notification ringtone in android

4) Now, Select Low battery level, Repeat interval, Vibration mode, Sound mode and Notification ringtone according to you need.
set low battery notification ringtone in android

Read More :- Conform List of Devices Get Android Nougat Updates
 
5) Done, You are successful to set low battery notification ringtone in android. Now according to your selected Low Battery Level, your Android phone will start ringing automatically on low battery and you will get notified. You can charge your phone before it will switched off due to low battery issue.

Download Here